Wednesday, November 16, 2011

Modern Indian dinner party makeup

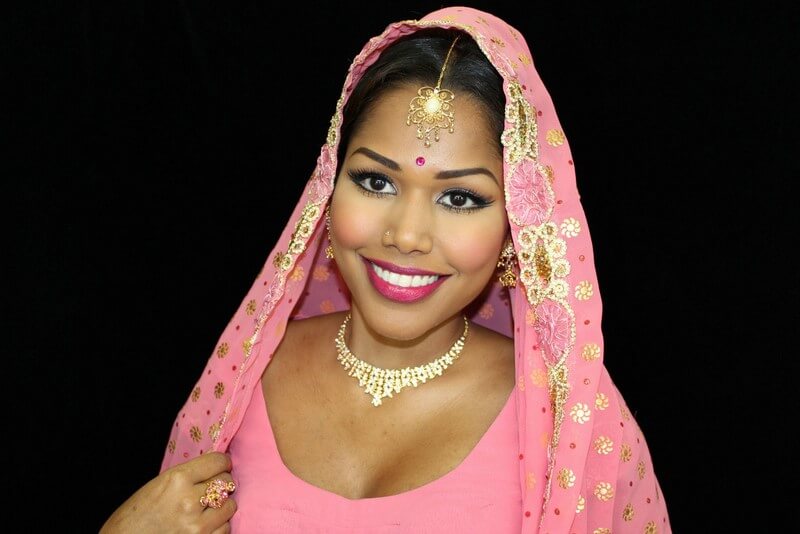
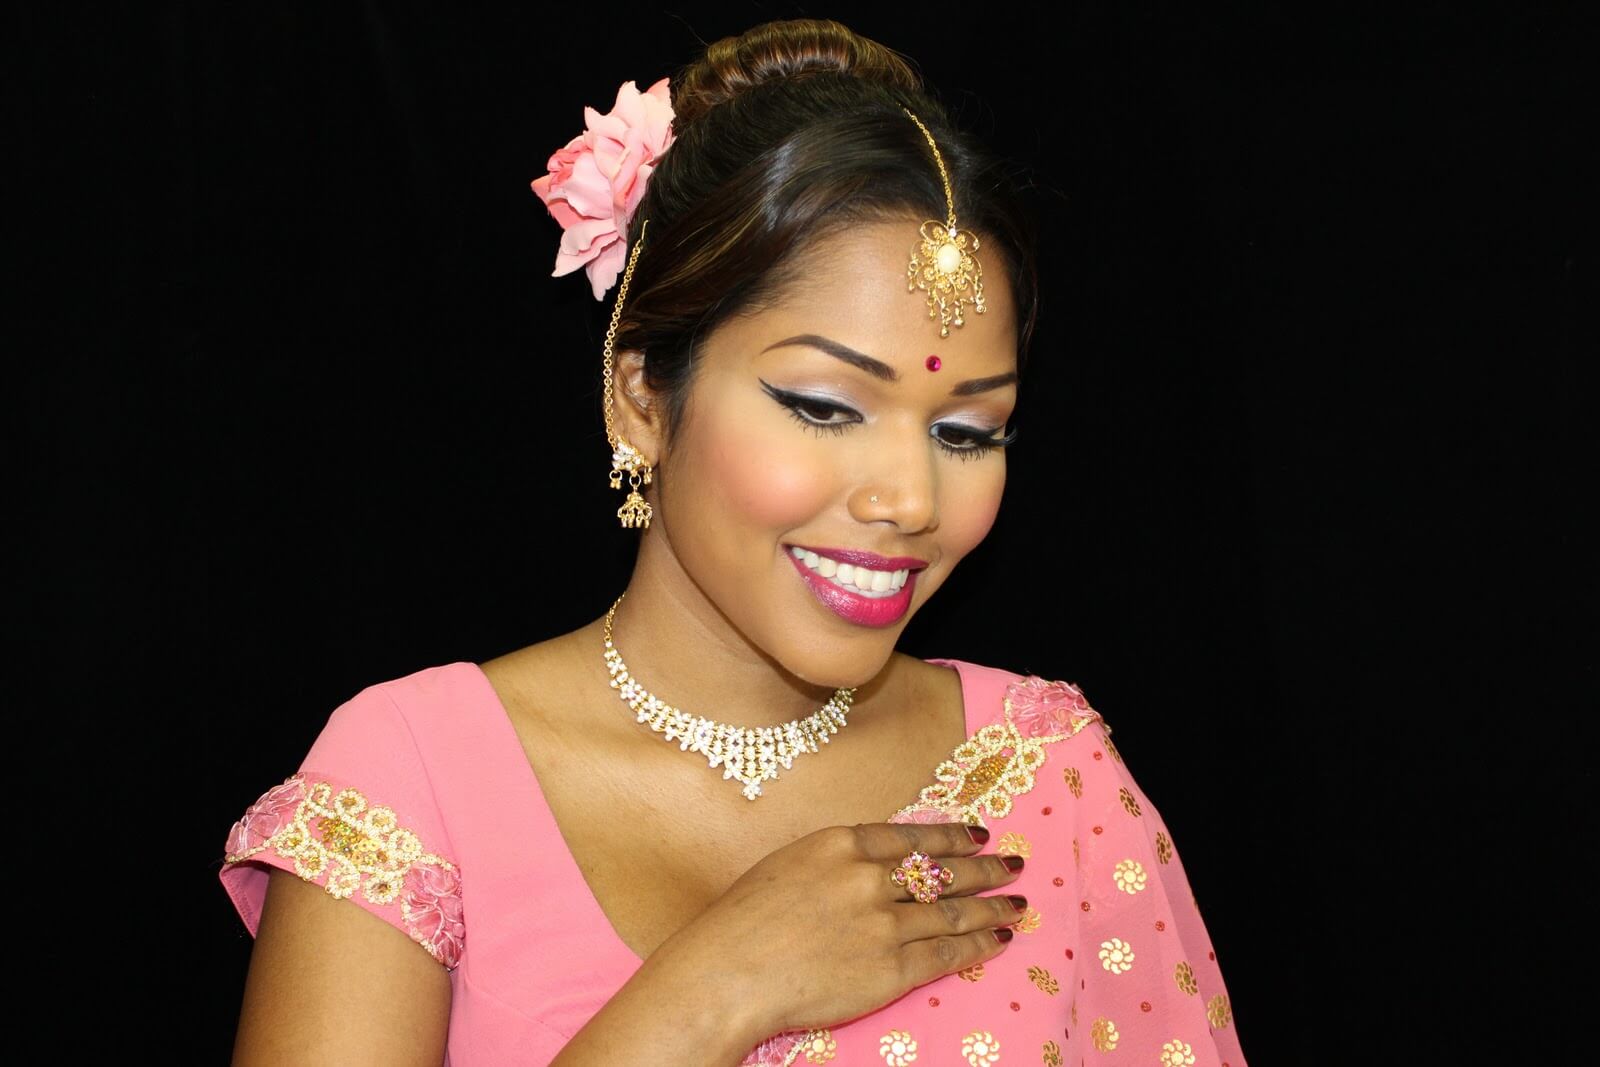
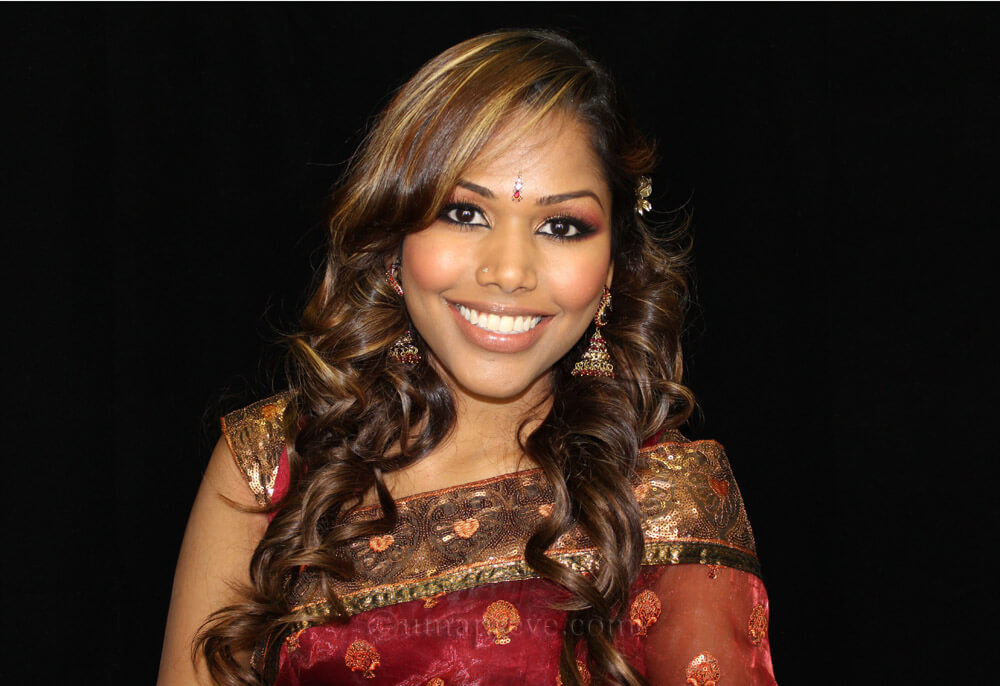
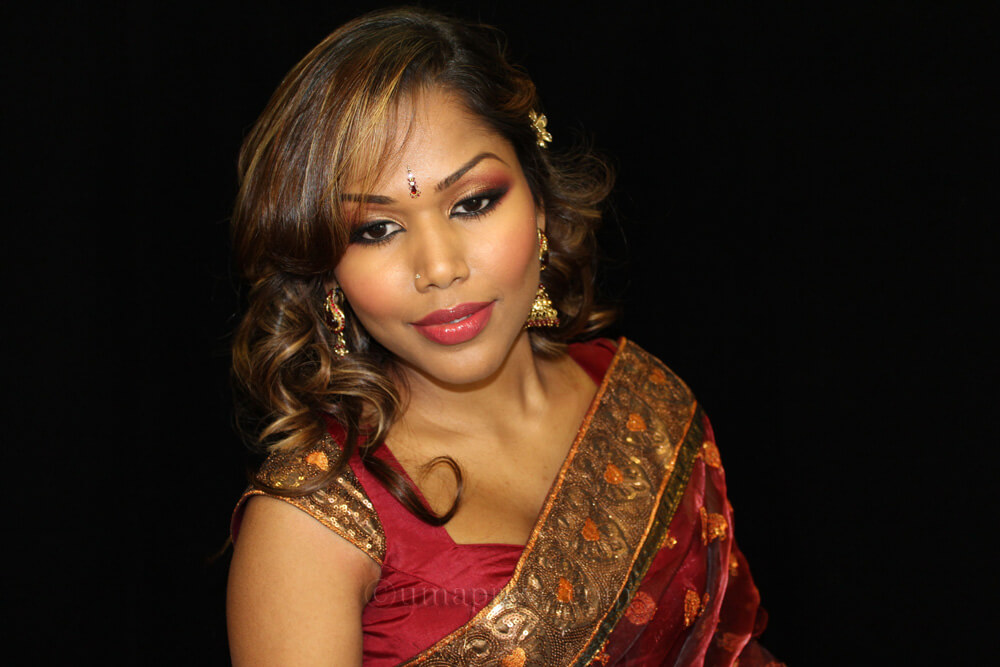
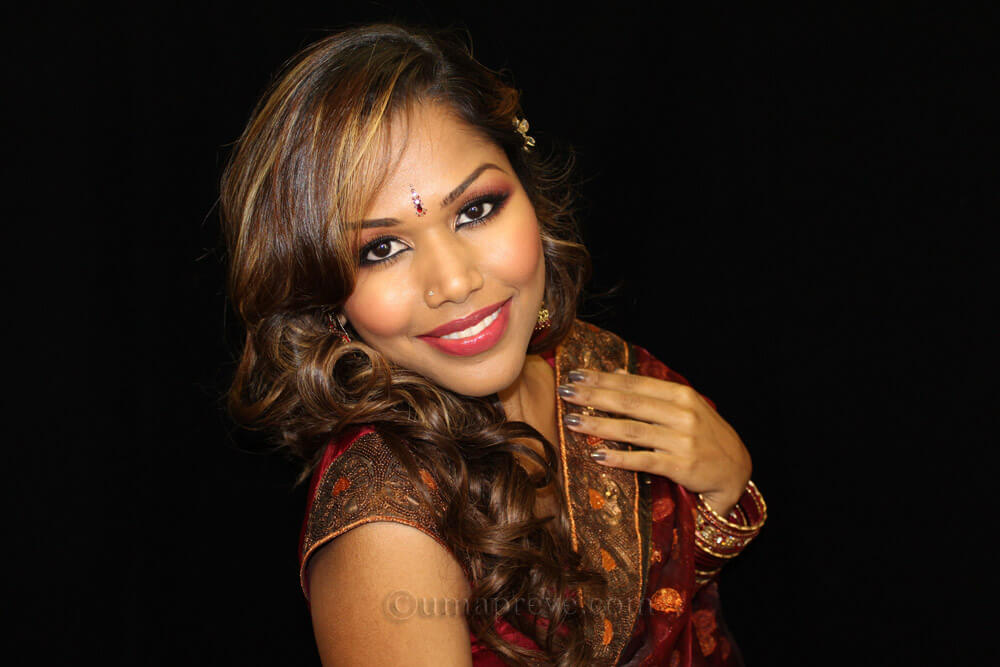
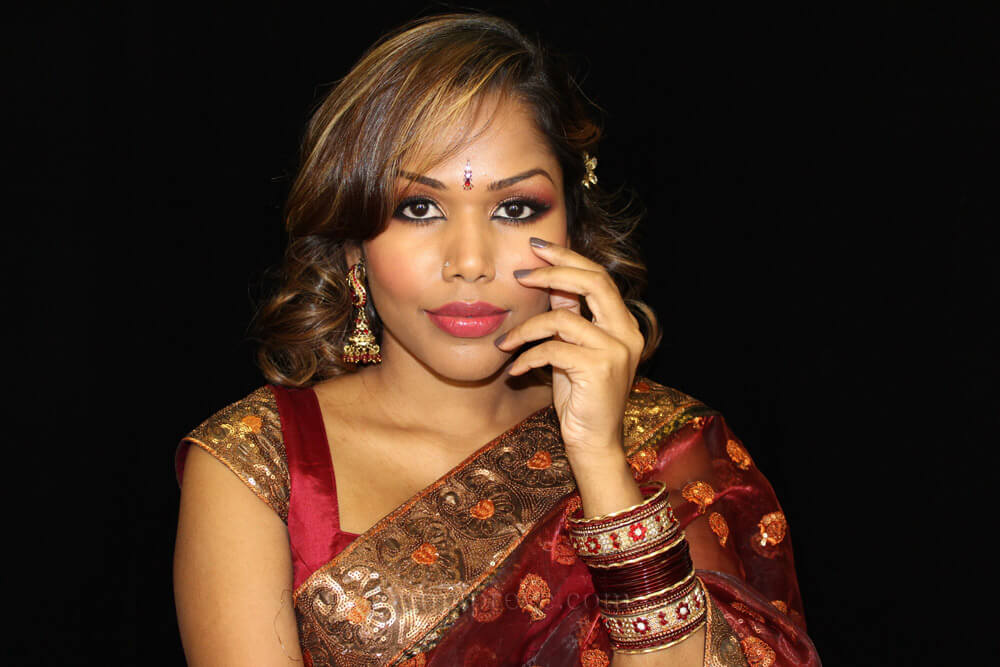
I love this look very much. I think it's the sari, that deep maroon shade with old gold sequin artwork. I treasure this sari a lot. This is because firstly my Mum chose this sari for me when I visited Singapore after I moved to Sweden earlier this year. Secondly, I wore this for my Husband's Doctorate ceremony at a castle in Sweden. I was one of the three ladies who wore sari (traditional Indian costume) for a traditional Swedish event. It was an awesome evening. 

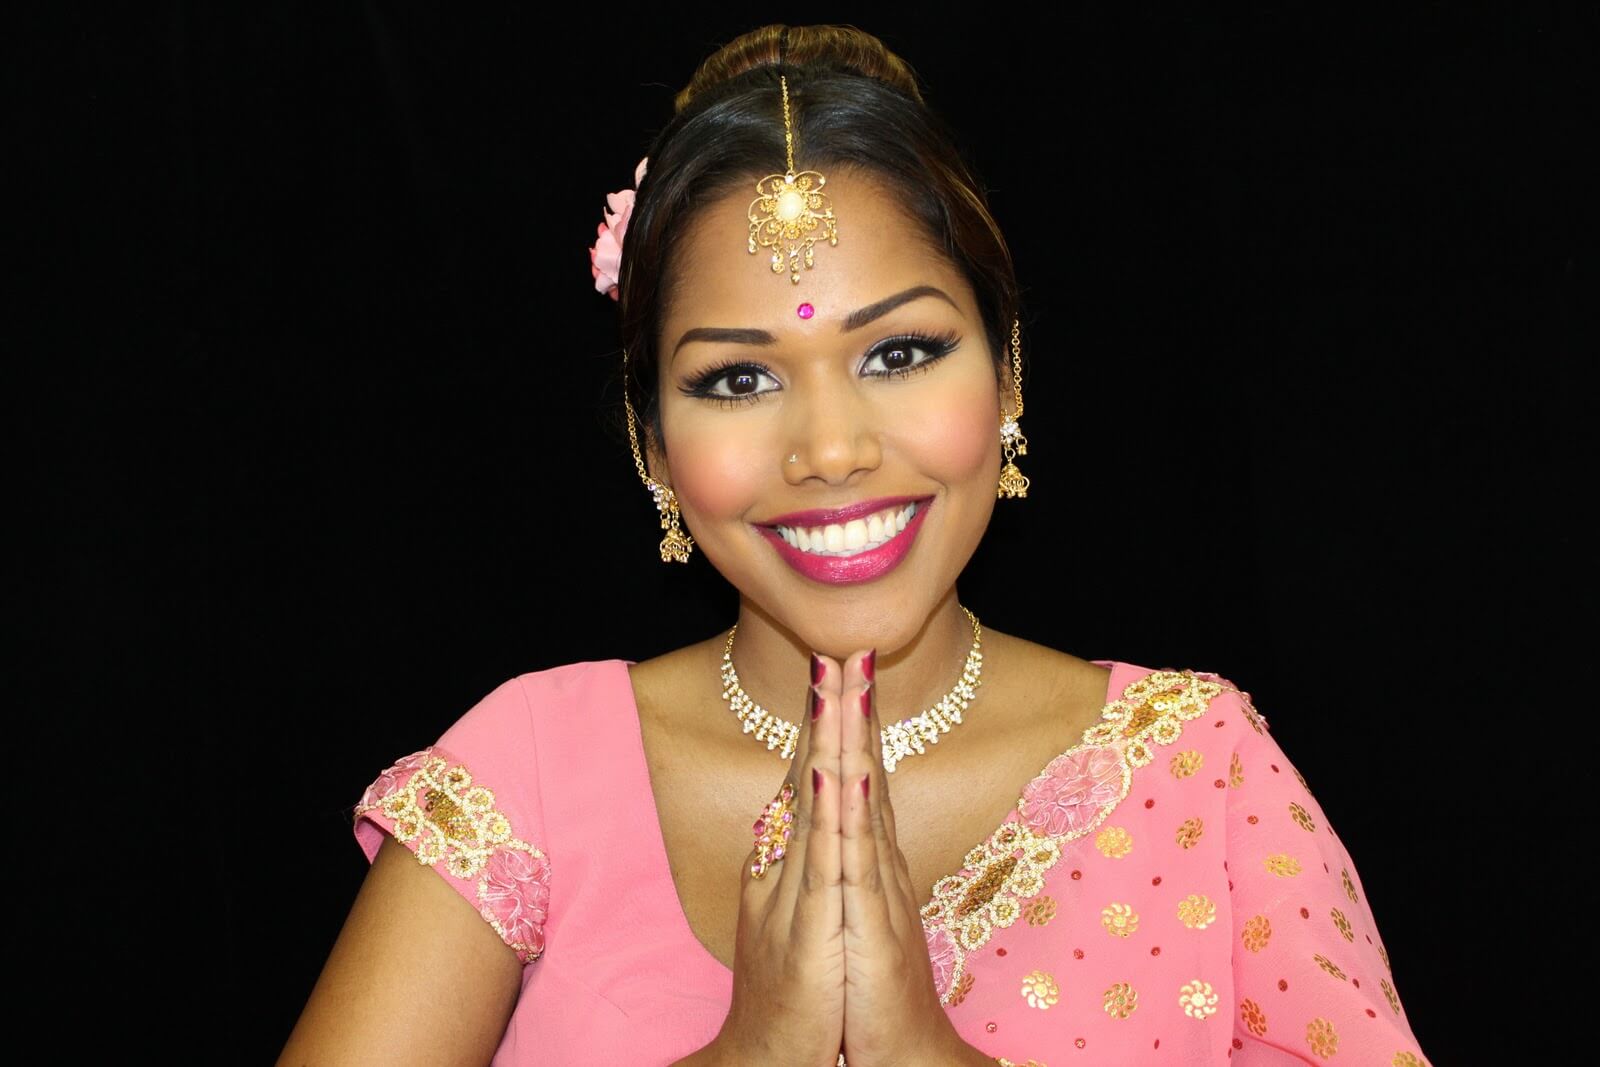
So I thought why not share it with you guys, so you can learn and perhaps use this makeup look for special functions and events someday. 


Products used are:

FACE
MUFE - HD primer #0
Revlon - Photo ready foundation in caramel #10
Mac - Select moisture cover concealer NC44
MUFE - HD Blush #02
Camera ready cosmetics - Yellow tinted loose powder

EYES
Mac - Indianwood paintpot
Mac - Feline khol pencil
Sugarpill - Love + eyeshadow
TKB - Bronzed gold loose pigment
Mac - Dipdown fluid line (eyebrows)
La femme - Black eyeshadow
La femme - Golden sunset loose pigment
Mac - Blacktrack fluidline

CHEEKS
La femme - Peach blush
La femme - Golden sunset loose pigment

LIPS
OCC - Betty peige lip tar
Nyx - Mauve lip liner
Gabrini - Red lipgloss (alternate colour)

HAIR
Rapunzel Rapunzel clip in hair extensions P4/6 (Brown/Medium brown)

Video Tutorial


Sunday, November 13, 2011

Earth toned makeup (using Urban Decay Naked palette)

Earth toned/Neutral makeup featuring the famous Urban Decay Naked palette. To be very honest, if you don't have this palette, you are not missing out much. I believe most of the colors are dupable from the 88 neutral eyeshadow palette which can be found on ebay and many other online makeup stores (eg, Coastal scents, Sedona lace, etc...). This look is appropriate for work, lunch out with friends and those days that you would like to tone down on makeup.

I hope you like this tutorial.


Products used are:

FACE
Luminess Air brush system (Will do a video about this system soon)

EYES
Urban decay - Primer potion
Urban decay - Buck & Darkhorse eyeshadow from the naked palette (eyebrows)
Mac - Dipdown fluid line
Urban decay - Buck eyeshadow from the naked palette (crease)
Urban decay - Naked eyeshadow from the naked palette (blending)
Urban decay - Sidecar eyeshadow from the naked palette (highlight)
Mac - Feline Kohl eye pencil
Loreal - Double extension carbon black mascara

CHEEKS
Luminess Air brush system - Apricot blush #7

LIPS
Mac - Fast play lipstick


Video Tutorial

Thanks for coming by!

Thursday, November 10, 2011

Viva La Diva Arty nail foils - Is it worth the $$?


I have received so many questions from viewers asking what I used on my nails in the recent "Queen Cleopatra inspired makeup look".
 It was self adhesive foils. It was my first time trying them. To be honest, when I bought them, I knew that they were not really going to last on my nails. However, I wanted to try. So while shopping at my local beauty supply store here in Sweden, I found the Viva La Diva Arty nail foils. I picked up two different designs, one was plain gold metallic foil and the other one was an animal print. 


These self adhesive stickers were pretty easy to apply. Instructions on application was provided on the back of the packaging. 

Pros
- Pretty looking nails
- Great for those days when you need a quick fix before heading out for a party or something.
- It was so easy to take them off. Just peel them off the nail slowly. 

Cons
- If you have a small nail bed like me, you will have to measure and cut, which can be inconvenient if you are in a hurry or do not have the patience.
- You will have to use a coarse nail file to file of the excess foil which I am not comfortable with.
- After a day or two, the foils start to peel off. (It drove me crazy!)
- Did not like that I had to mildly file the surface of my nail first before applying the foil. 

Overall
If you are looking at getting fancy looking nails at the comfort of your home, these self adhesive foils would work. Just be prepared that they don't last as long as a regular nail polish would. Can't expect much from stickers right!?


Have anyone of you tried the nail stickers before? What do you think if them?


Tuesday, November 8, 2011

60s & 70s Inspired Indian/Bollywood bridal makeup

Recently, I have become very interested in tracing the Indian makeup trends through the different eras and thought I should start from the 1960s/70s. 1960s and 1970s were the era of colours for both Bollywood and Kollywood (Tamil) movies. Black & white movies were facing out. This was the era where makeup was kept simple, classy and doll like . I have great memories from my childhood watching old classic tamil movies with my maternal grandmother. Then, as a child, I didn't really appreciate the beauty of the actresses. 

All my tutorials on Youtube are planned and I usually do my research before making the videos. Did a simple search on Youtube and found that there wasn't many videos dedicated to the makeup trends of this era (in terms of Indian bridal makeup of course). I made this tutorial based on the pictures I have seen of the old actresses thus I can't ensure that this was how makeup was done then. However, it is quite close to the classic Indian beauties of the 60s/70s. As always, I have made sure that this look was suitable & wearable in the current times.


Here are the Tamil/Hindi actresses who are the inspiration for this look.

Sadhana, Saroja Devi, Sharmila Tagore & Mumtaz

Products used are:

FACE
Mac - Pro longwear foundation Nc45
Mac - Pro longwear concealer Nc50 (for mixing)
Mac - Select moisture cover concealer Nc44
Camera ready cosmetics - Yellow tinted loose powder

EYES
Mac - Dipdown fluidline
Mac - Fresco paintpot
Inglot - Pale pink e/s
Mac - Deep/Dark mineralized skin finish
Mac - Blacktrack fluidline
Mac - Chomographic pencil Nw25/Nc30
Nyx - Baby pink eyeliner
Loreal - Double extension carbon black mascara
Ebay - False lashes

CHEEKS
La femme - Stormy rose blush

LIPS
Mac - Gulabi lipstick 

*All accessories are from my own collection. Some are as old as 15 years old. 

Video Tutorial


I hope you like this look. 

Have a great week lovelies!


Friday, November 4, 2011

DIY: Basic Manicure (with simple nail art for short nails)


After moving to Sweden, I have become a very DIY person. Everything is so expensive here! Mainly because of the taxes. Now one of the things that I have learnt to do on my own is doing my own nails. Yes, I was very spoiled in Singapore as I would get my hands and feet done every month in a salon. It was very affordable and it made me happy. Ultimately, that is what matters! Don't you think so?

In my recent videos, many viewers have requested for me to do a DIY manicure/pedicure tutorial as they felt that my nails were well kept. Now, I need to clarify this. Firstly, I have dry hands (cuticles and feet) as I am a very hands on person when it comes to cleaning, washing dishes, etc... Oh, might add that the Swedish weather has not been kind to my skin either. Lastly, I have no choice but to do mani/pedicures myself as I want to save money and not let my nails deteriorate.

I have made a video tutorial showing you how easy it is to get your nails done at the comfort of your home. You can use the same technique on toe nails too. I know many will start asking to do a pedicure video. Well, my toes are camera shy, so no videos in the near future featuring my little piggies (Sorry!).

Products used are :-

Sally Hansen Nail polish remover
Cotton pad
Glass nail file (much better than emery board files)
Towel (Optional)
China Glaze white tea extract manicure soak (Cuticle softener)
Manicure soak bowl (or any type of shallow container)
Cuticle pusher or orange stick (personally prefer the rubber tip ones as they are gentle)
Cuticle cutter
Seche vite nail treatment for weak and thinning nails
The Faceshop Almond oil cuticle & nail balm (vaseline works well too)
Nail art stencil sticker
H&M Red nails polish
H&M Golden treasure polish
Orly in a snap top coat (this has a quick drying formula)


Video Tutorial