Hi everyone,
I received a comment from an anonymous blog follower saying that he/she was not able to view my blog pictures because of the new blog layout. He/she also says that it could be that the problem is isolated in Australia. Is it true?
I would really like to know because if it is a problem with the new blog background/ layout, I will let blogger.com know about it and change it. I want my followers to have a pleasant time visiting my blog. It means a lot to me!
I really hope you could let me know asap. I would really appreciate that very much!
Anyways, I have not been able to post anything as we are having some problems with the current apartment. It is taking a lot on me mentally as I am new to this country and I do not understand the language. Looks like we might have to look for another apartment soon. So another round of packing and moving. Just can't wait for this period of my life to be over and done with. Just that we have been very unlucky with certain things that are happening in our lives now. Really want it to be over soon!
Till next time, have a wonderful weekend and Father's day!

Sunday, June 20, 2010
Friday, June 11, 2010
Beef Pasta (Singaporean....Uma's style)
Today, I come to you with a recipe that is fairly easy and is an all in one dish. When I say all in one, that means the dish contains meat and vegetables. This is a dish I came up with in the beginning of my courting days with my then boyfriend (now husband). He likes asian and spicy food. So I thought why not a fusion pasta! (So now you know how I stole his heart ~ the way to a man's heart is through his stomach!)
Thanks to Eve, I was encouraged to show my kitchen skills. I never thought anyone would be interested in knowing what I can cook up. Anyway, here is it.
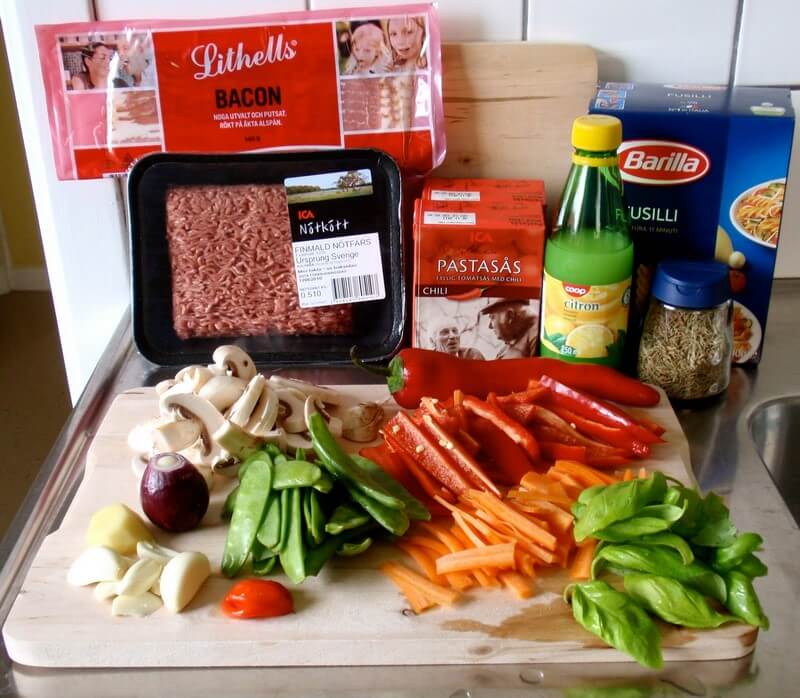
The ingredients needed are:
1) Minced meat - about 500 grams (preferably beef)
2) Streak bacon - 4 slices (optional but recommended as it enhances the taste of the dish)
3) Cumin seeds - 1 teaspoon
4) Onion - 1 ea
5) Garlic - 4 pulps
6) Ginger - 2 cm in thickness
7) Lemon juice - a splash
8) Chili pepper - 2 ea (sliced)
9) Carrot - 1 ea (sliced)
10) Mushrooms - 4 medium sized ones (sliced)
11) Snow peas - a handful
12) Basil leaves - a handful
13) Pasta - fusilli or penne (your choice)
14) Pasta sauce or crushed tomatoes (I am lazy so I use ready made pasta sauce)
15) Salt and pepper
16) Italian herb mix - a pinch (optional)
17) Habanero chili - half a fruit (optional)
STEP 1
Cut the vegetables as needed.
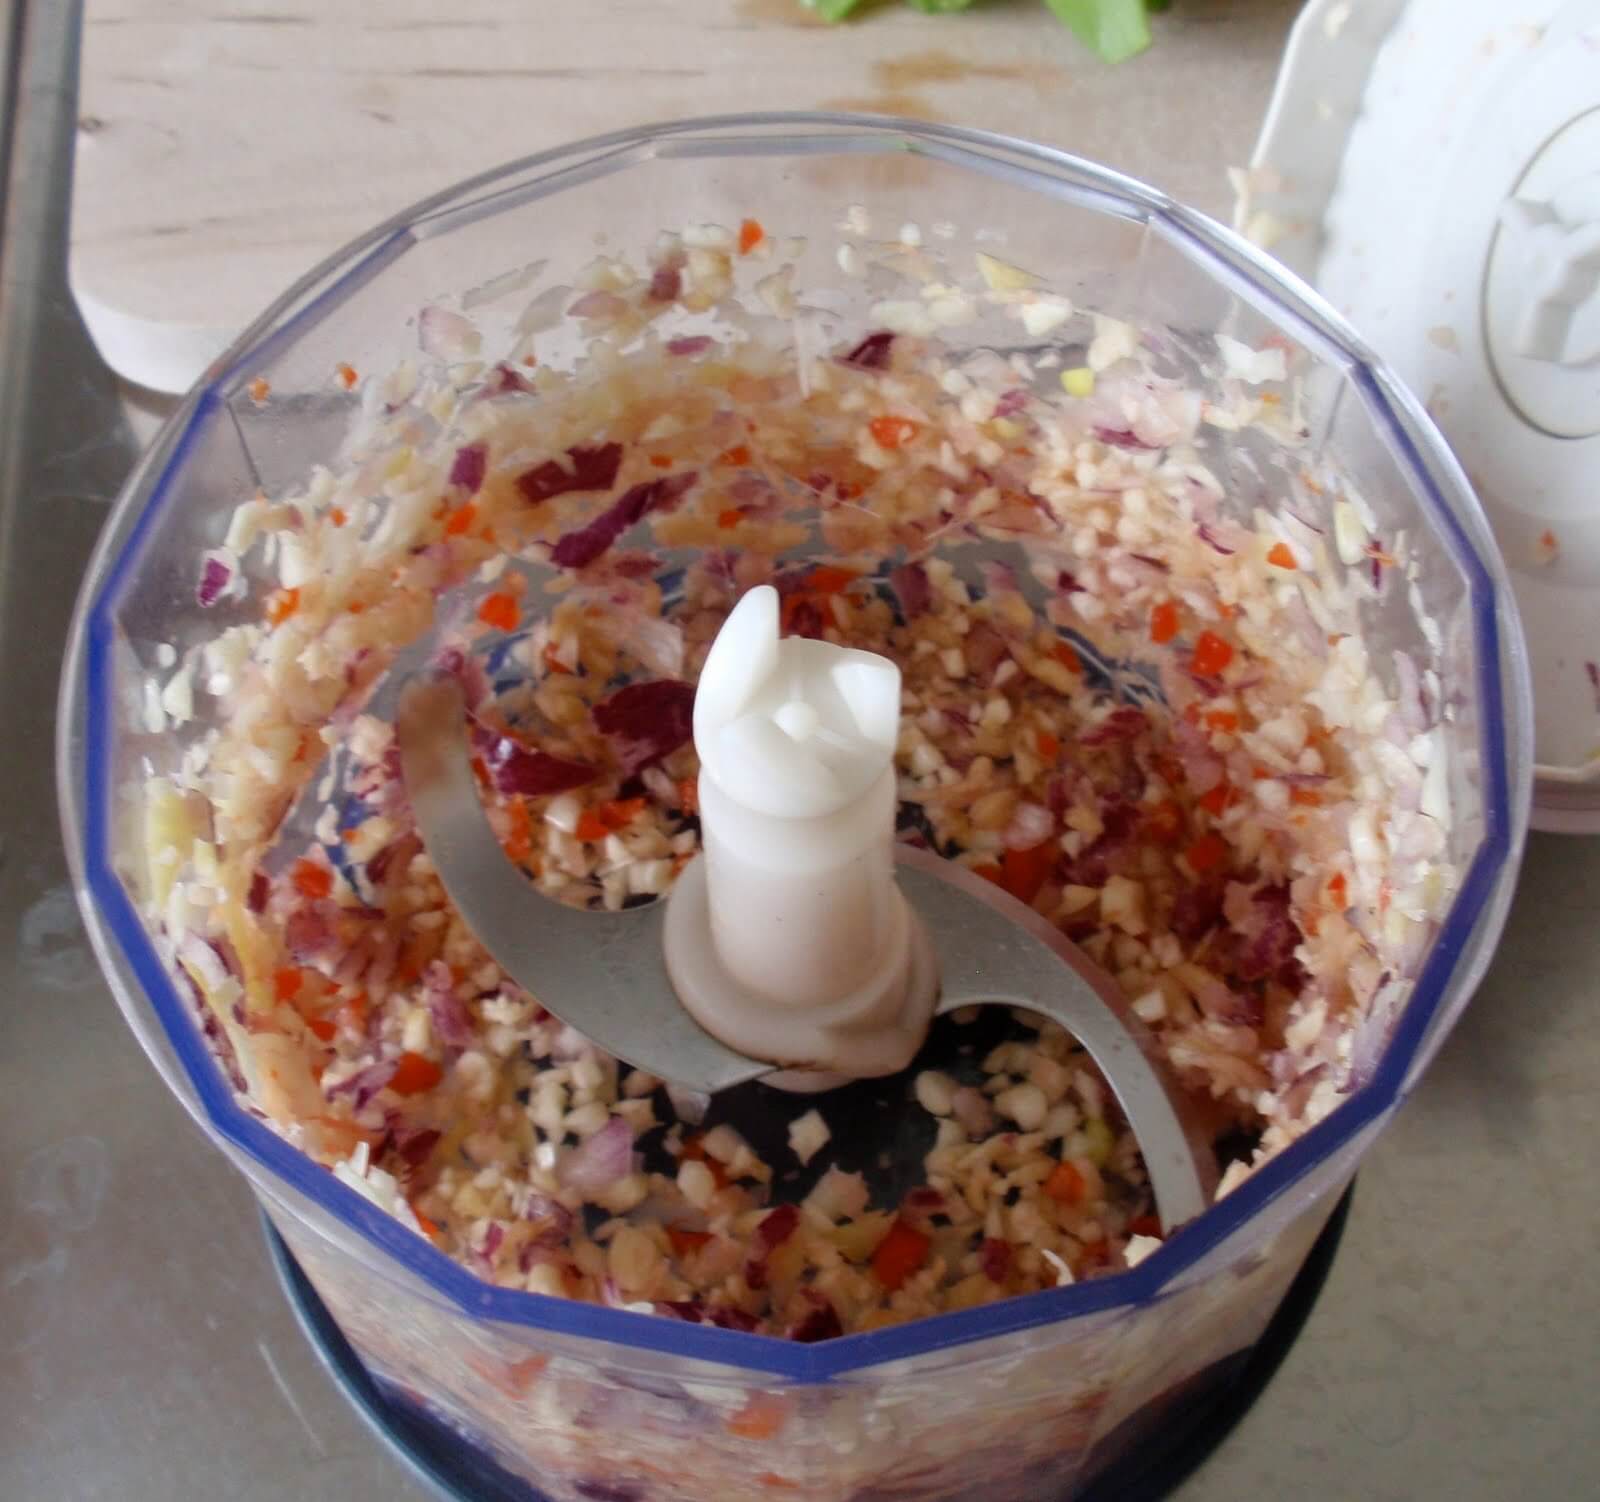
STEP 2
Chop the onion, garlic, ginger and chili.
STEP 3
Start boiling the pasta with a pinch of salt in it in a separate pot.

STEP 4
Fry/crisp the bacon, set it aside and cut it into bits. Do not add any oil as the bacon will secreted some fat which can be used later.

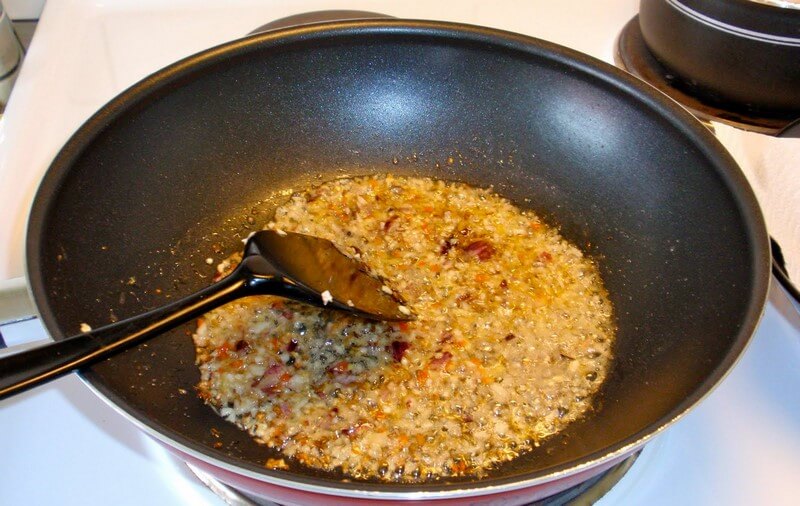
STEP 5
With the fat that is left from the bacon, add cumin seeds, onion, garlic, ginger and chili and start fry it for 1 min.
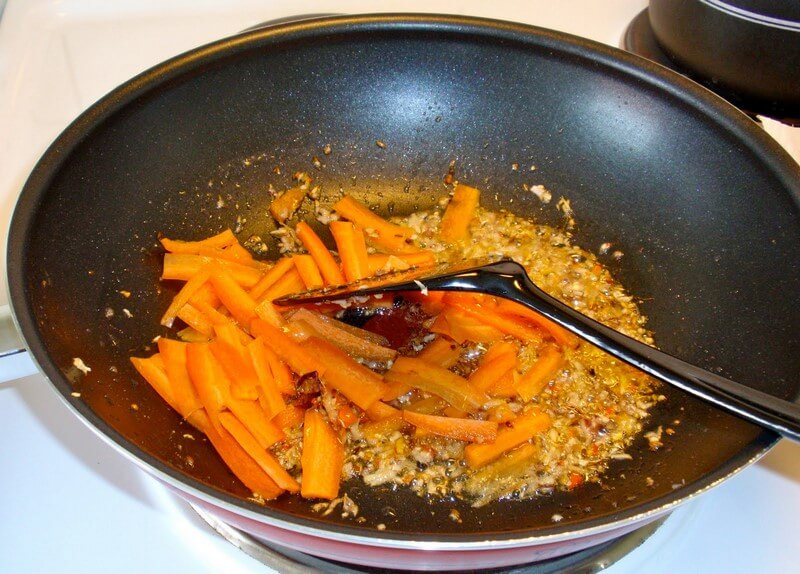
STEP 6
Add the carrots and let it cook for 1 min ( the sweetness of the carrot will come out)
STEP 7
Add the minced beef and let it cook till there is no liquid left from the beef.
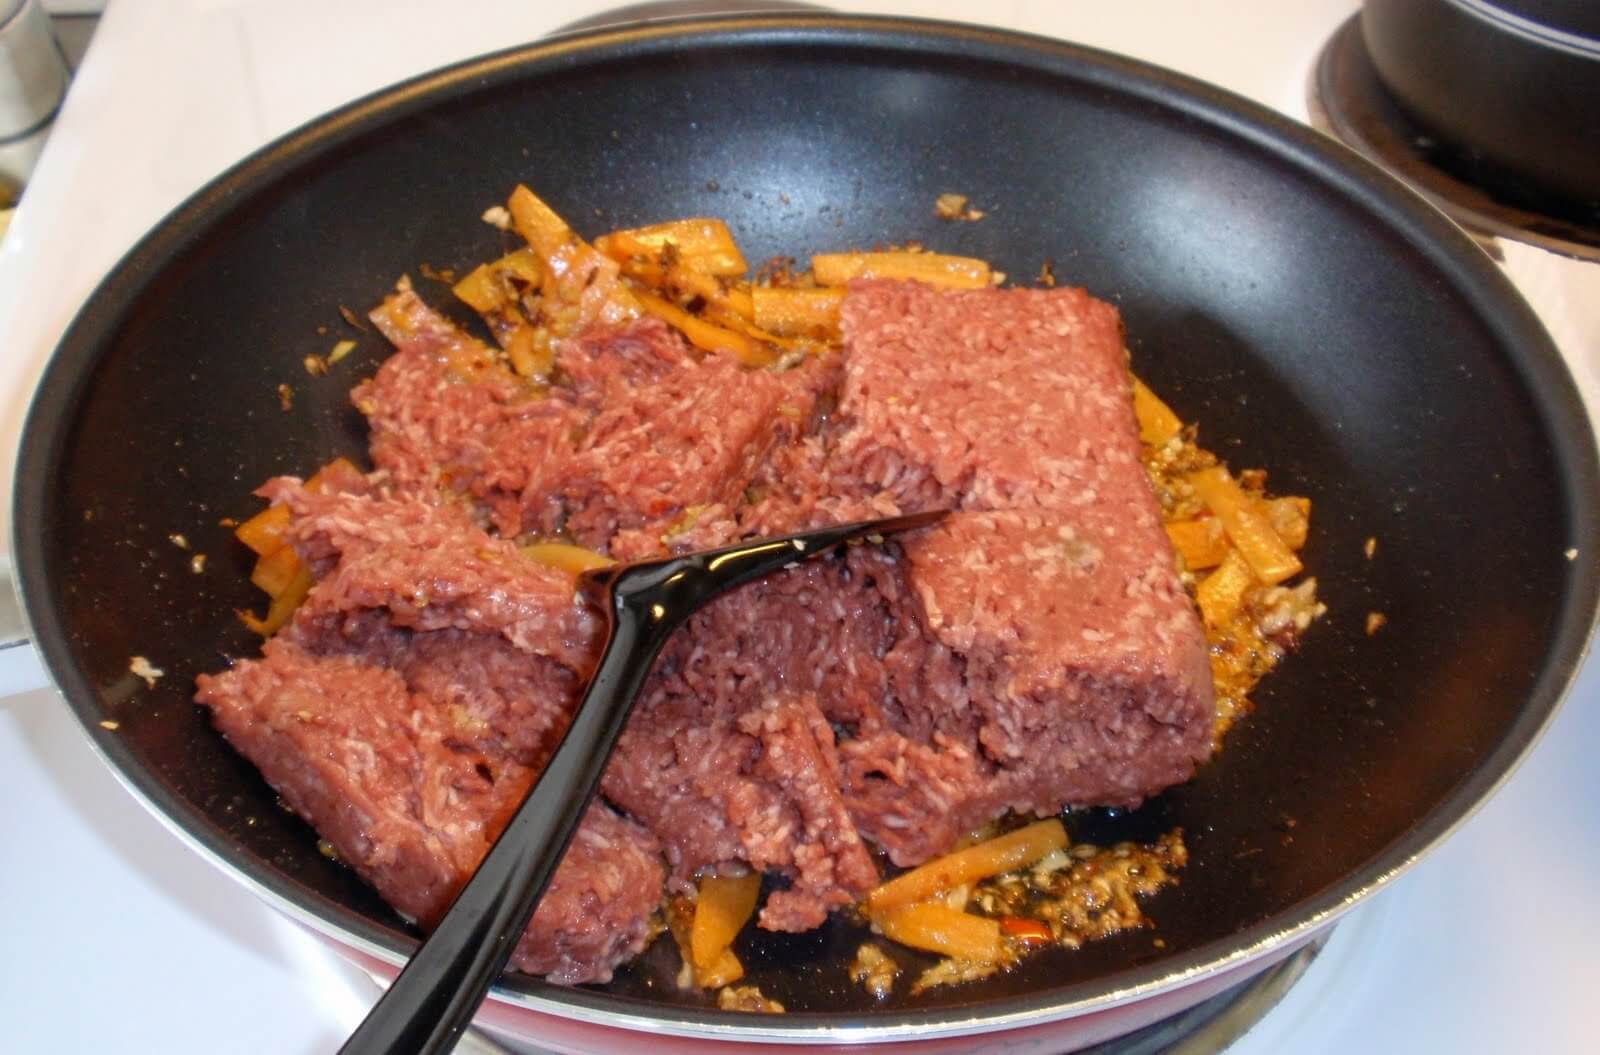
STEP 8
Add the mushrooms, let it cook till the mushrooms shrink in size.
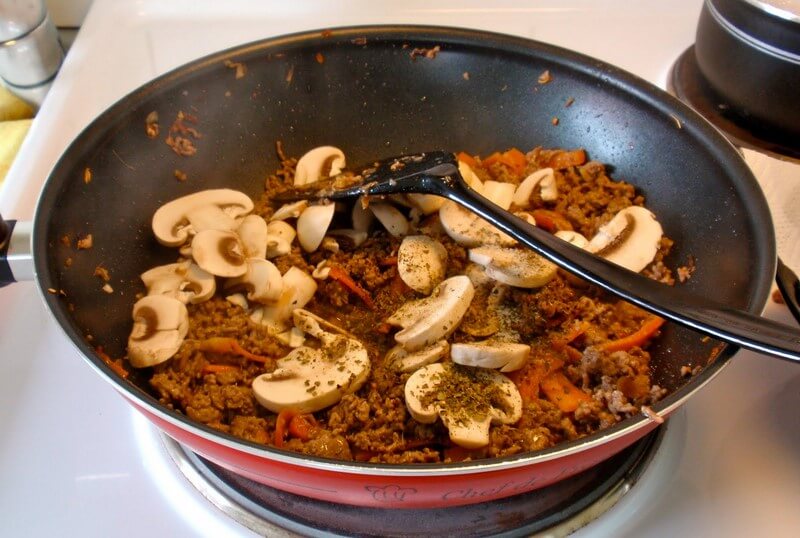
STEP 9
Add the pepper chili, snow peas and the pasta sauce. Mix well and let it simmer for 2 mins.

STEP 10
Add the basil leaves, salt, pepper and italian herb mix. Let it simmer for another min or so.

STEP 10
Add the pre- boiled pasta (drain the water as we do not want the starchy water). Give it a good stir, taste and switch of the stove. Let it simmer in the remaining heat from the dish.

FINALLY
Serve and enjoy!

This dish goes very well with garlic bread.
Hope you try it!
Till next time, have a wonderful weekend!
Love Love
Thursday, June 10, 2010
DIY project: Earring holder
I have a gazillon earrings and jewelry pieces (store bought and handmade by me). I believe that the earrings/ necklaces should be hung and not be put away in a drawer. Doing that will distort the earring and you will never know what you have. Now with a earring holder, you can pick and match the earrings to your outfit without the frustration of going through drawers of jewelry (trust me I have been there and done that!). I thought maybe this step by step guide will give you some inspiration to make one your own. You don't have to spend a lot to make this (promise). Use what you have and be innovative. Anyway, here is the guide. If you have any questions, please feel free to ask.
Tools and things needed are :
1) Pen knife
2) All purpose glue
3) Thumb tacks or board pins ( you can also use sewing pins)
4) Chain or wire (I have a roll of chain in my beading stash so that came handy)
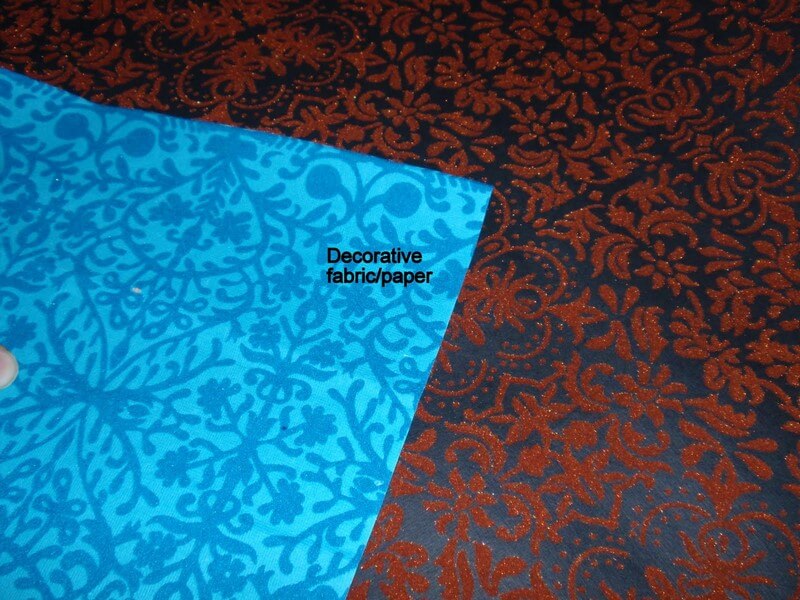
5) Decorative fabric or paper ( the ones I am using are scraps of wrapping paper)
6)Ikea soft notice board ( I am sure you can use two layers of think cardboard too)
7) Sewing pins - optional ( To keep the decorative paper in place after glueing)

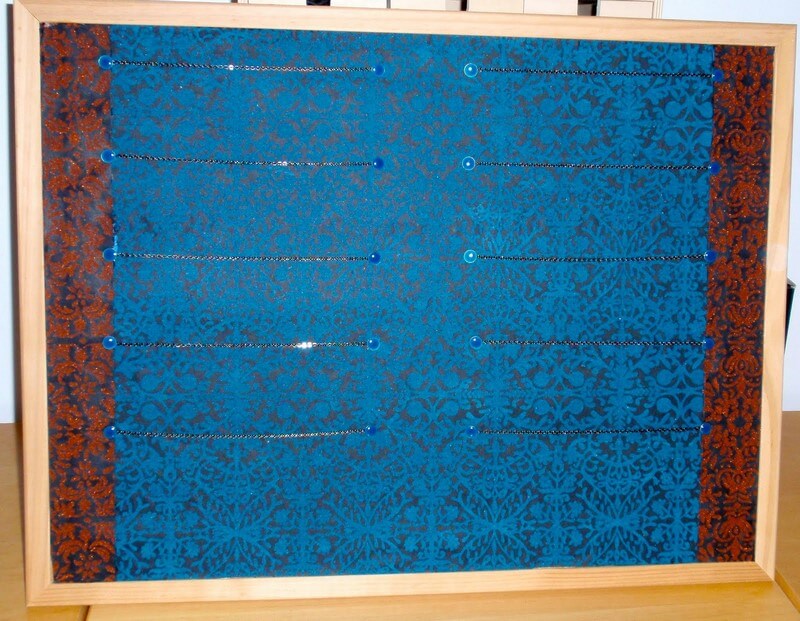
STEP 1
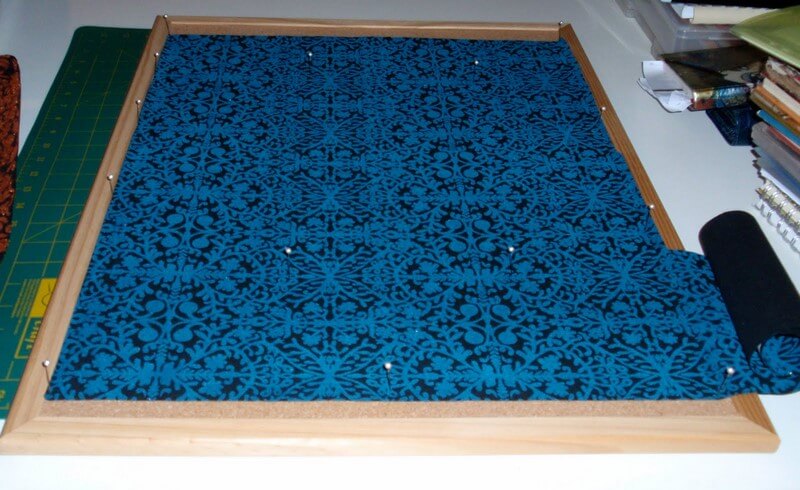
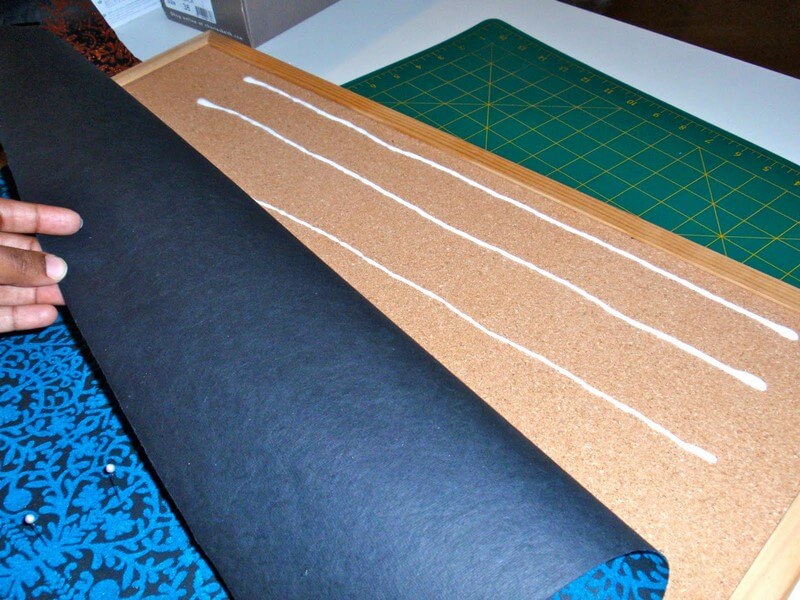
Align the decorative paper onto the ikea notice board. Cut away the excess paper. I am using sewing pins to keep the paper from curling up.
STEP 2
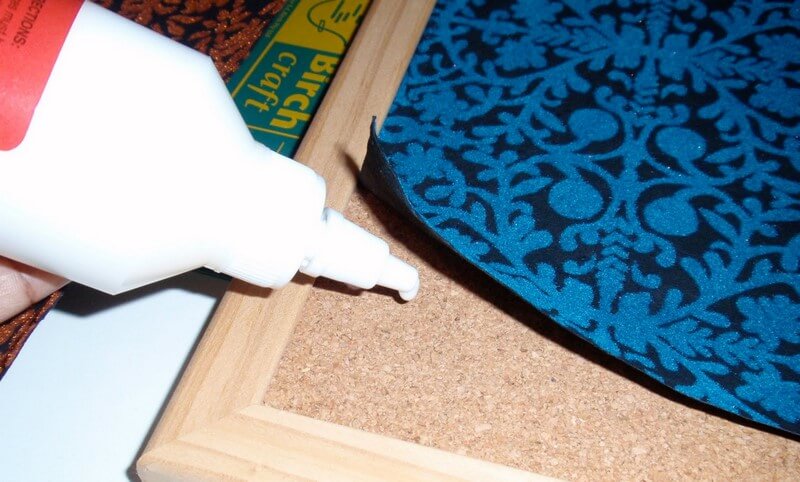
Squeeze some glue onto the notice board just like so.
Make sure to cover the corners as they might curl up if not glued properly.
STEP 3
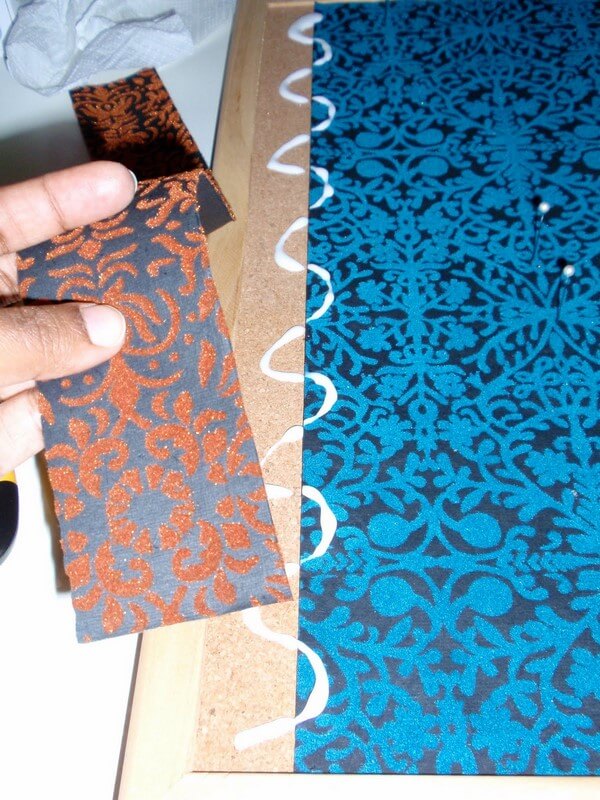
Since I didn't have enough deco paper to cover the whole board, I had to use another contrasting colored deco paper to cover the sides.
STEP 4
Use sewing pins to keep the glued paper in place. Allow the glue to dry for 2 hours.

STEP 5
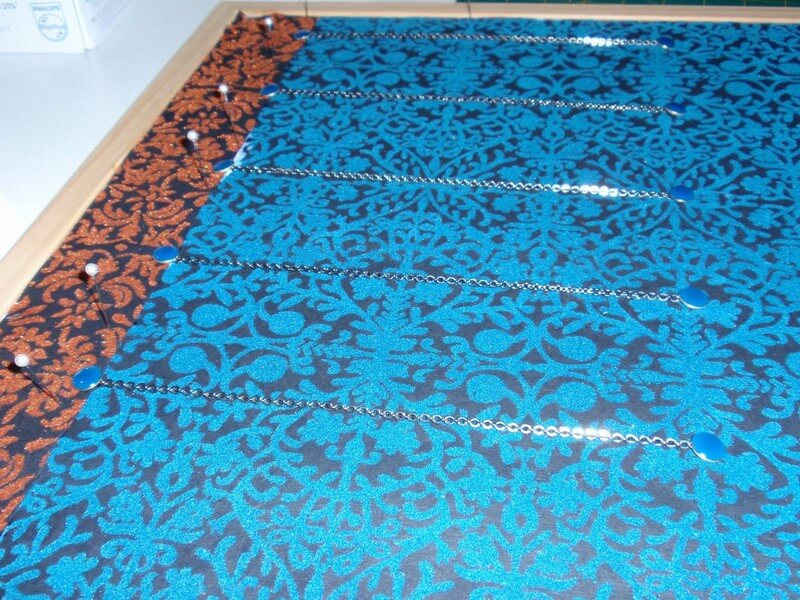
With the pre-cut chains (15cm), use thumb tacks to place them as illustrated. (This is preferred for dangling earrings)
Whoa la....
A home made earring holder YAY!
Place your beautiful earrings and you are ready to hang it either in your wardrobe/closet or your creative corner. Mine will be hanging on the wall where I do my make up and makeup videos!
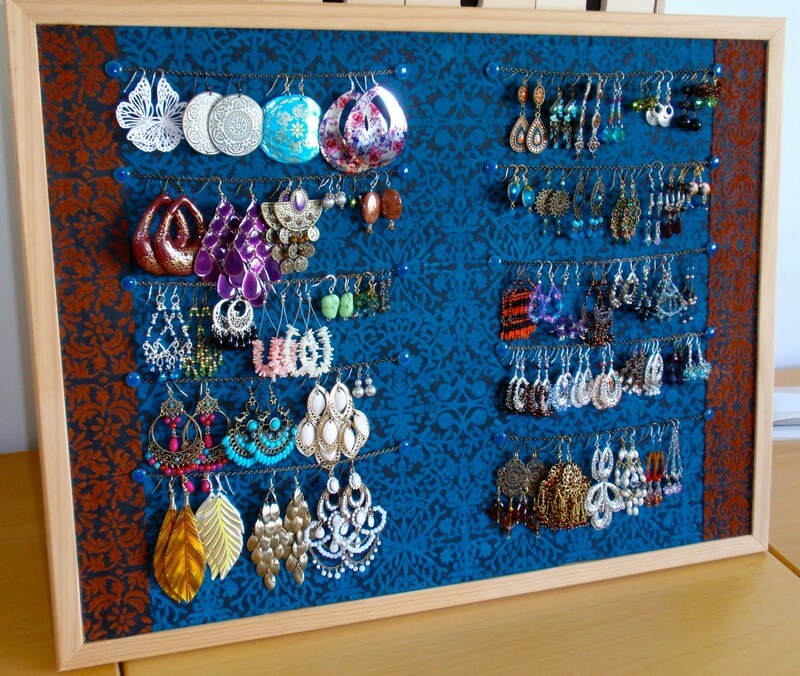
I hope some of you might find this useful and try it out.
Till next time,
Love Love
(PS: I am going to make two more holders as it turned out quite nice and it makes a great backdrop when I make Youtube videos!)
Wednesday, June 9, 2010
Haul: LUSH (Fresh handmade cosmetics)
I just cannot resist the temptation of going into LUSH and picking out nice smelling soaps. They smell so good! OMG, I have never had any soap that smelled this nice. Guess what my darling hubby likes it too! Anyway, these are what I bought.
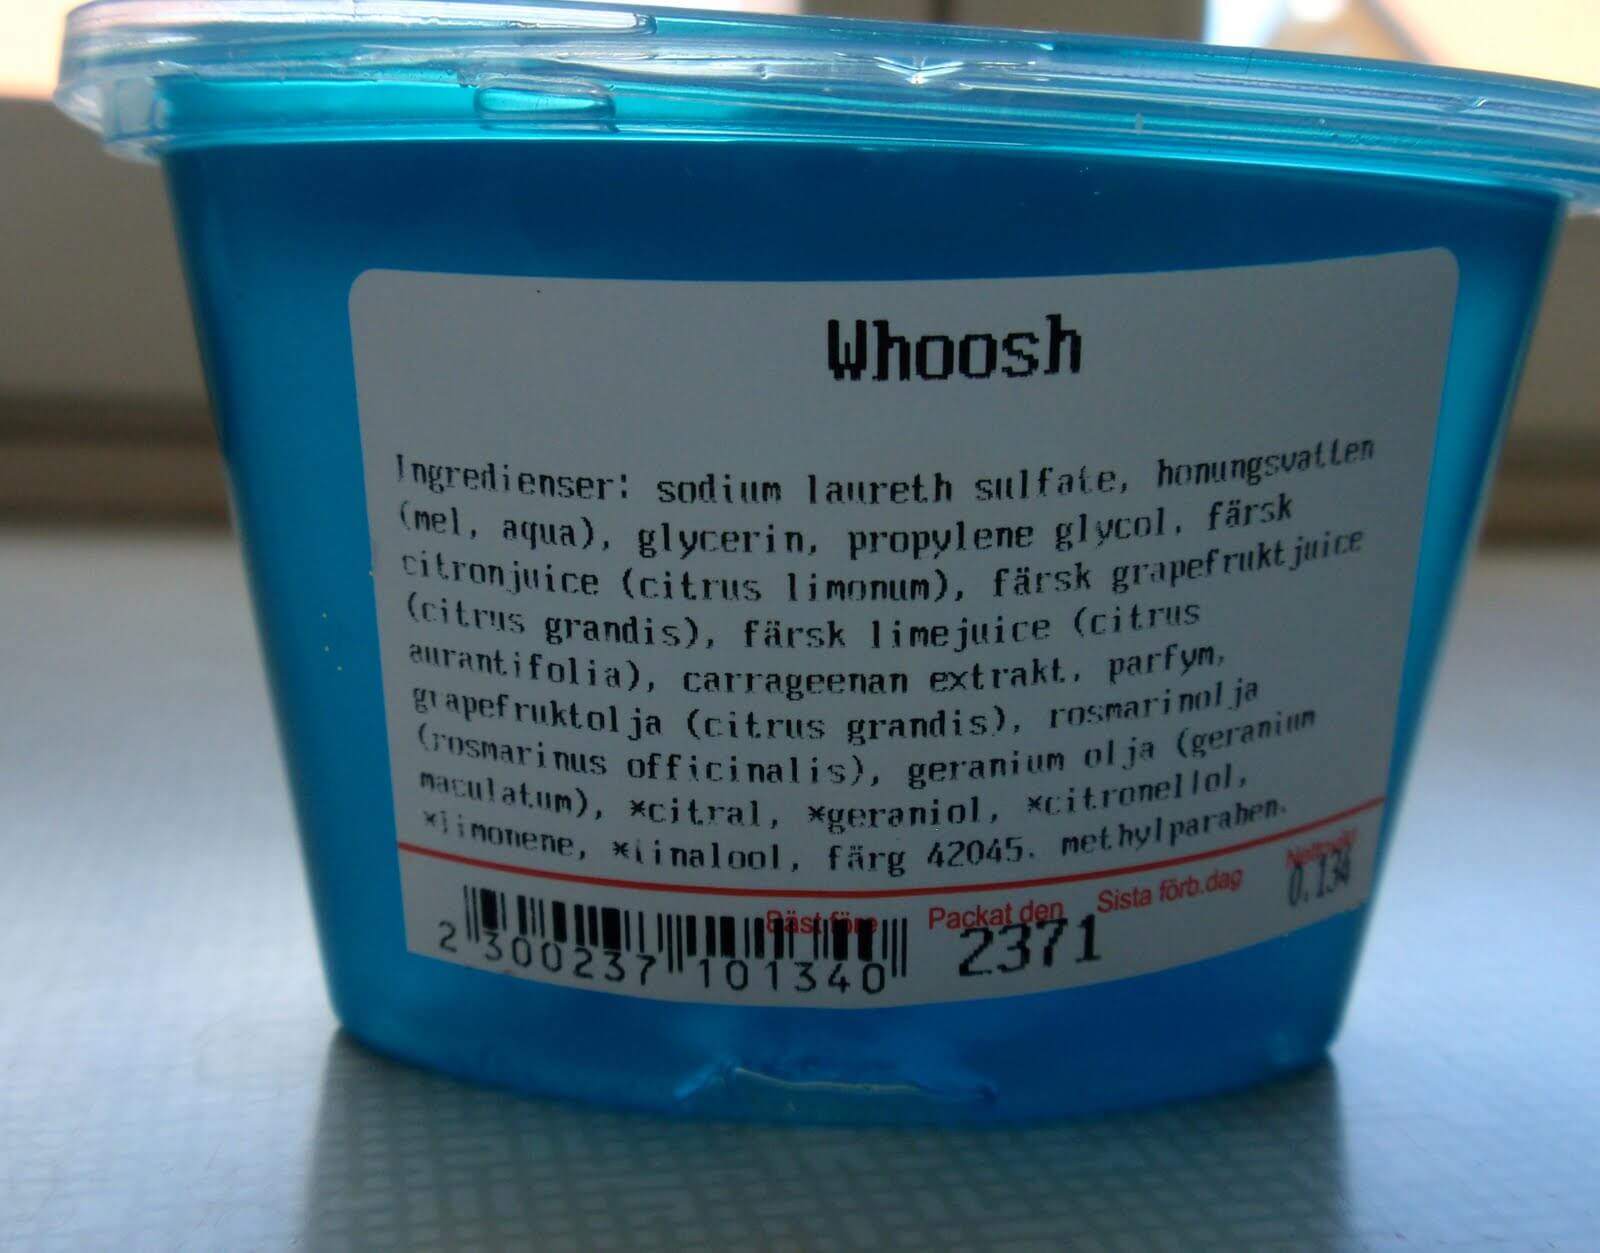
Whoosh (shower jelly) - Smells so fresh, I think this scent is suitable for men as well as ladies.
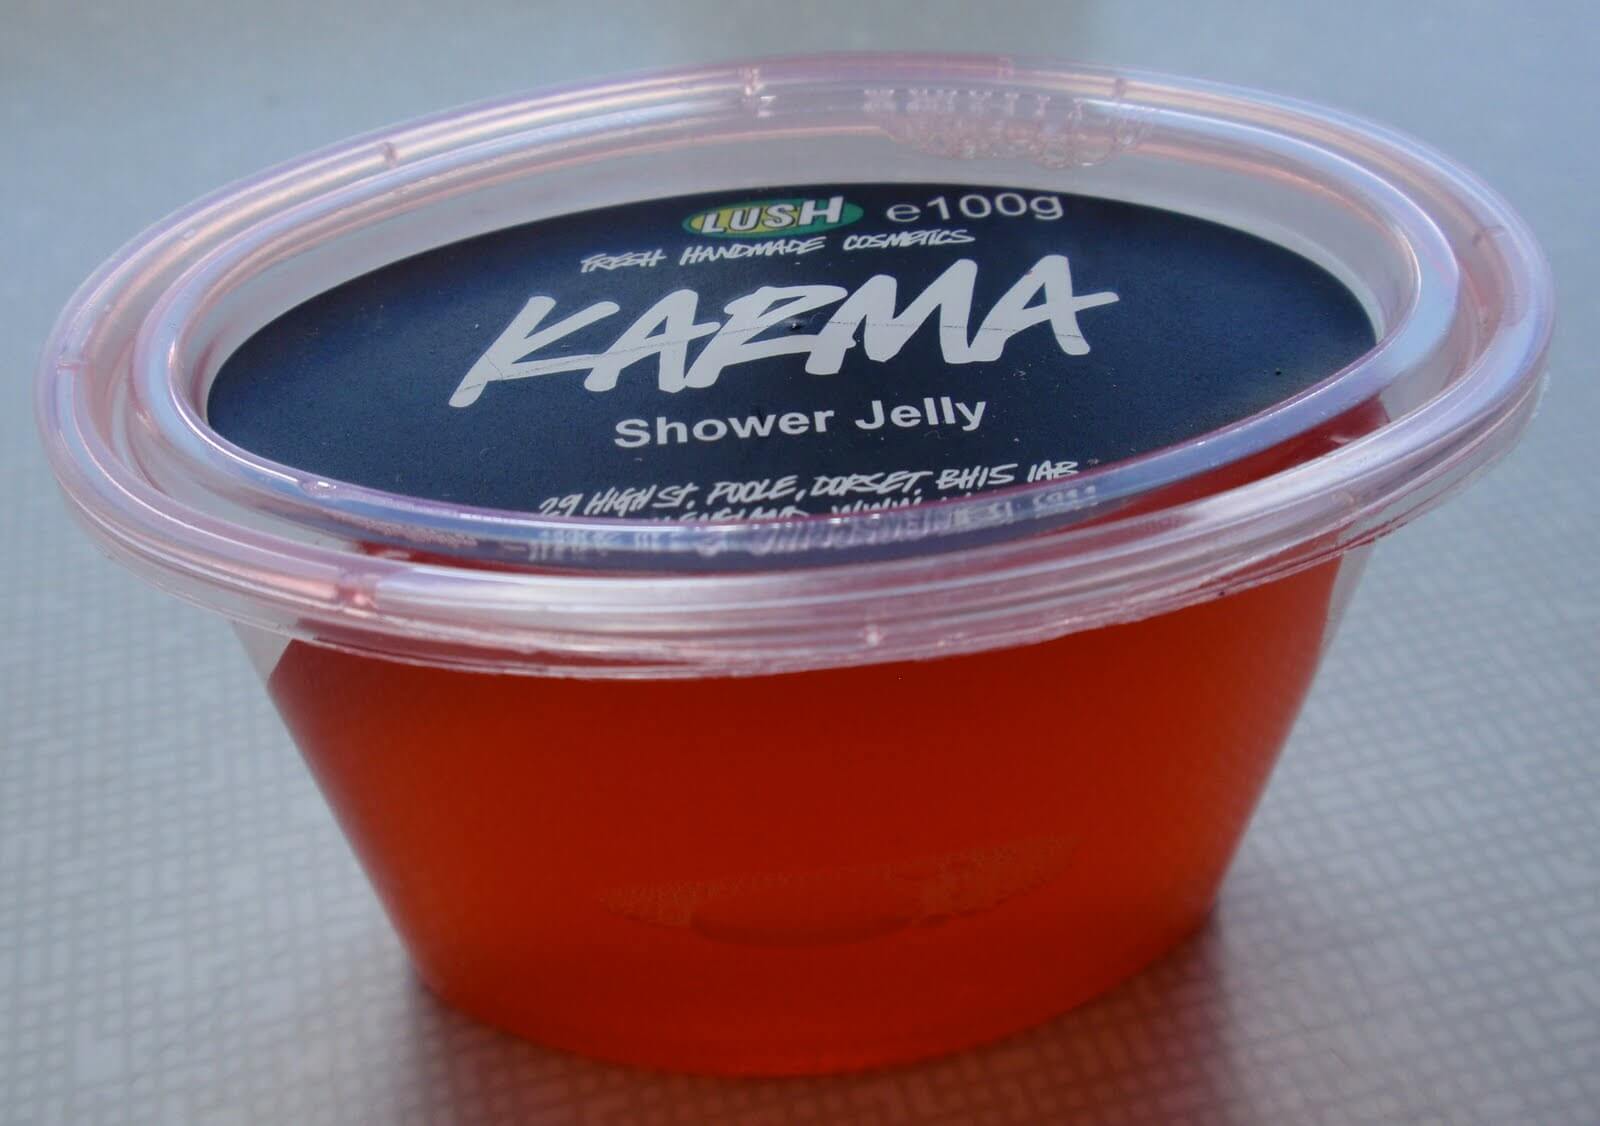
Karma (shower jelly) - smells like peppermint and some floral scent. It's a great 'pick me up' scent!
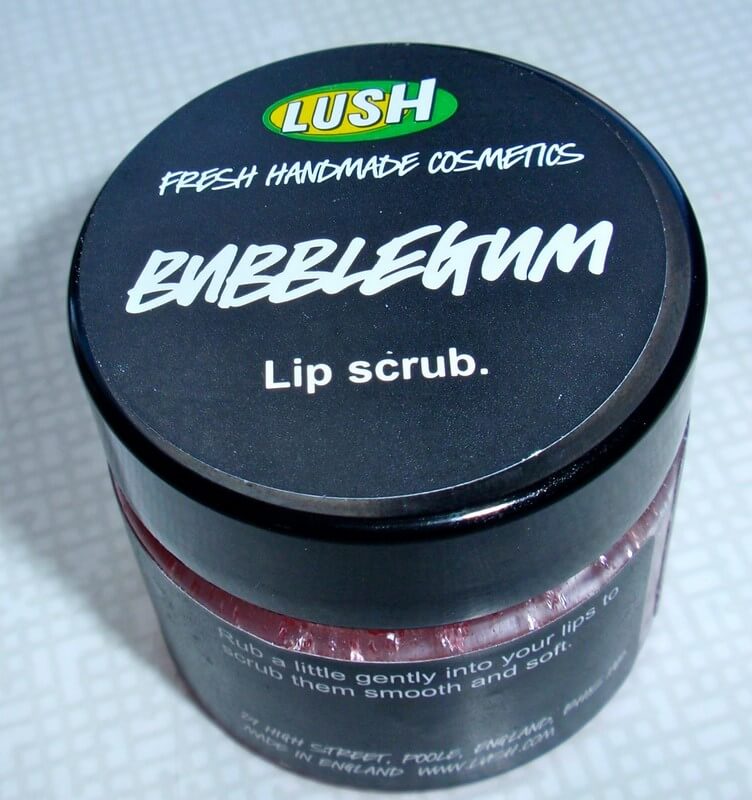
Bubblegum lip scrub - of cos it smells like bubble gum. I use it twice a week and apply vaseline afterwards. The results are super soft, kissable lips.
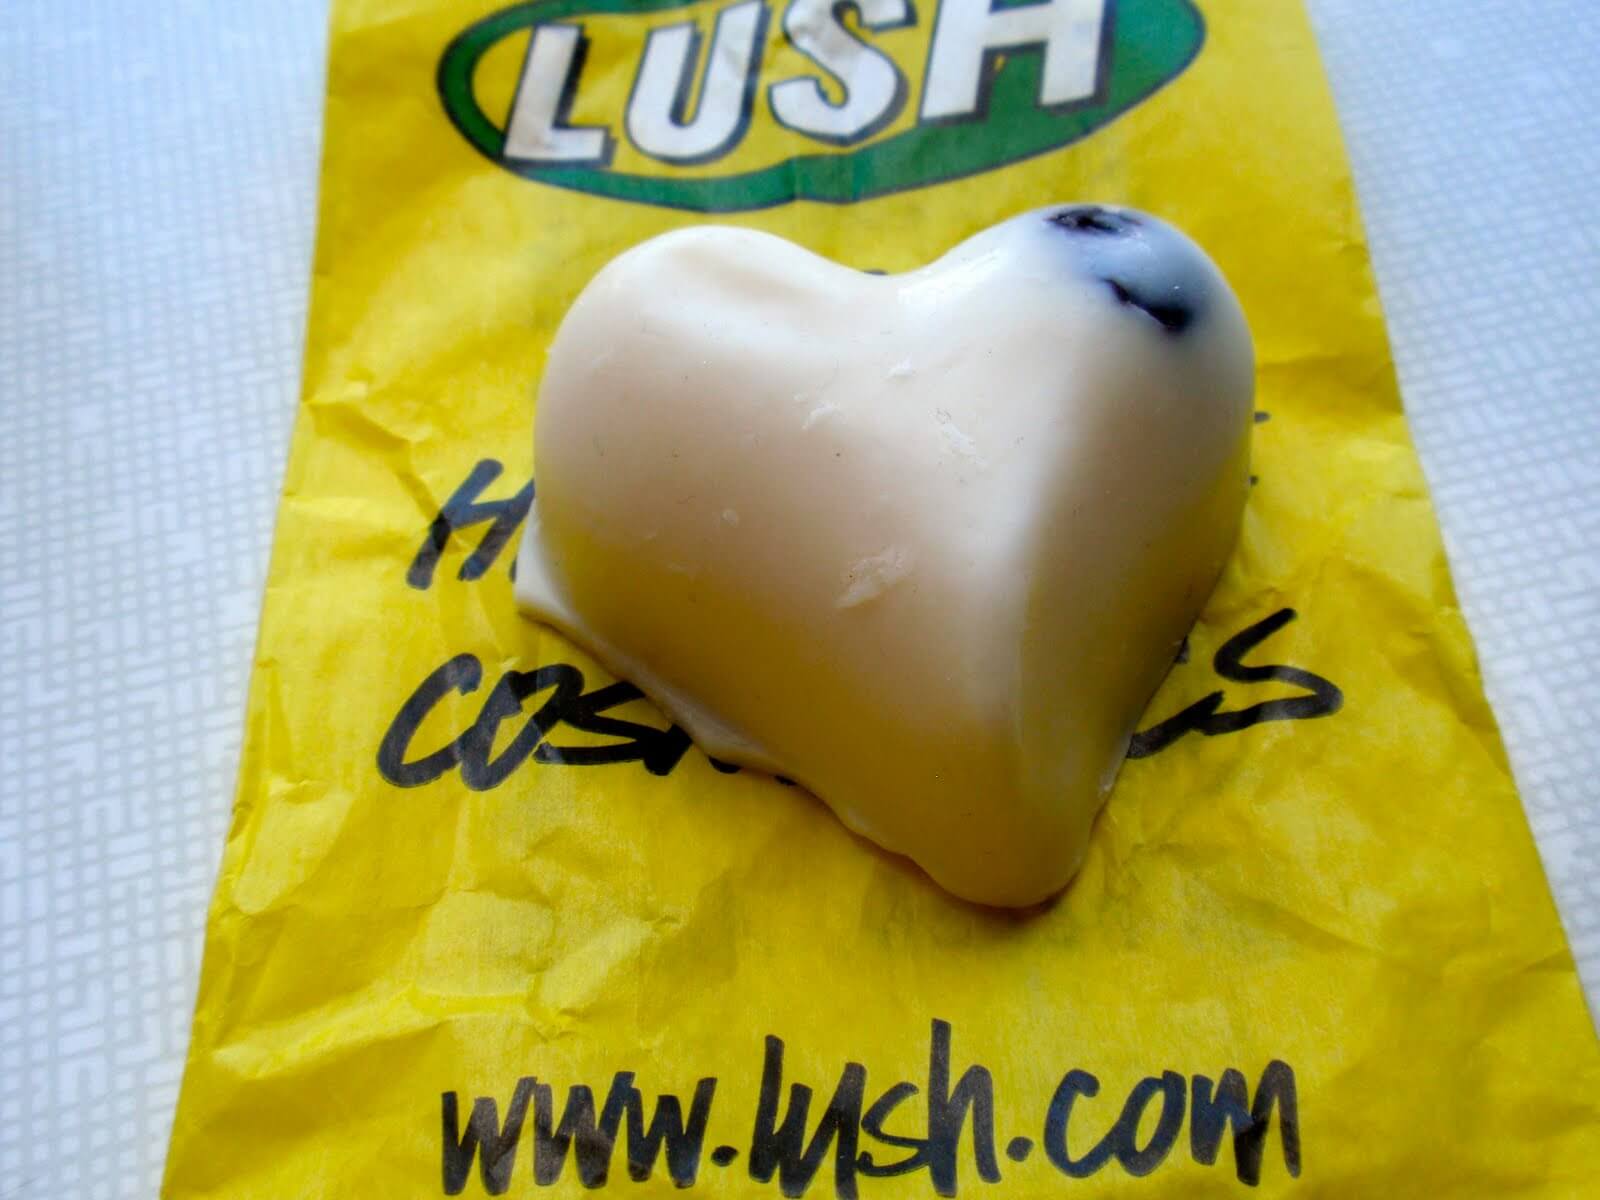
Soft coeur (the honeymooner) - If you like the smell of cookies, this is it! My husband loves this scent on me (I leave it to your imagination to why! Naught hubby!).
Hisuan Wen Hua hair mask - I have not tried this yet. It's nearing the expiry date thus I didn't dare use it. Will be exchanging for a new one at the store tomorrow.
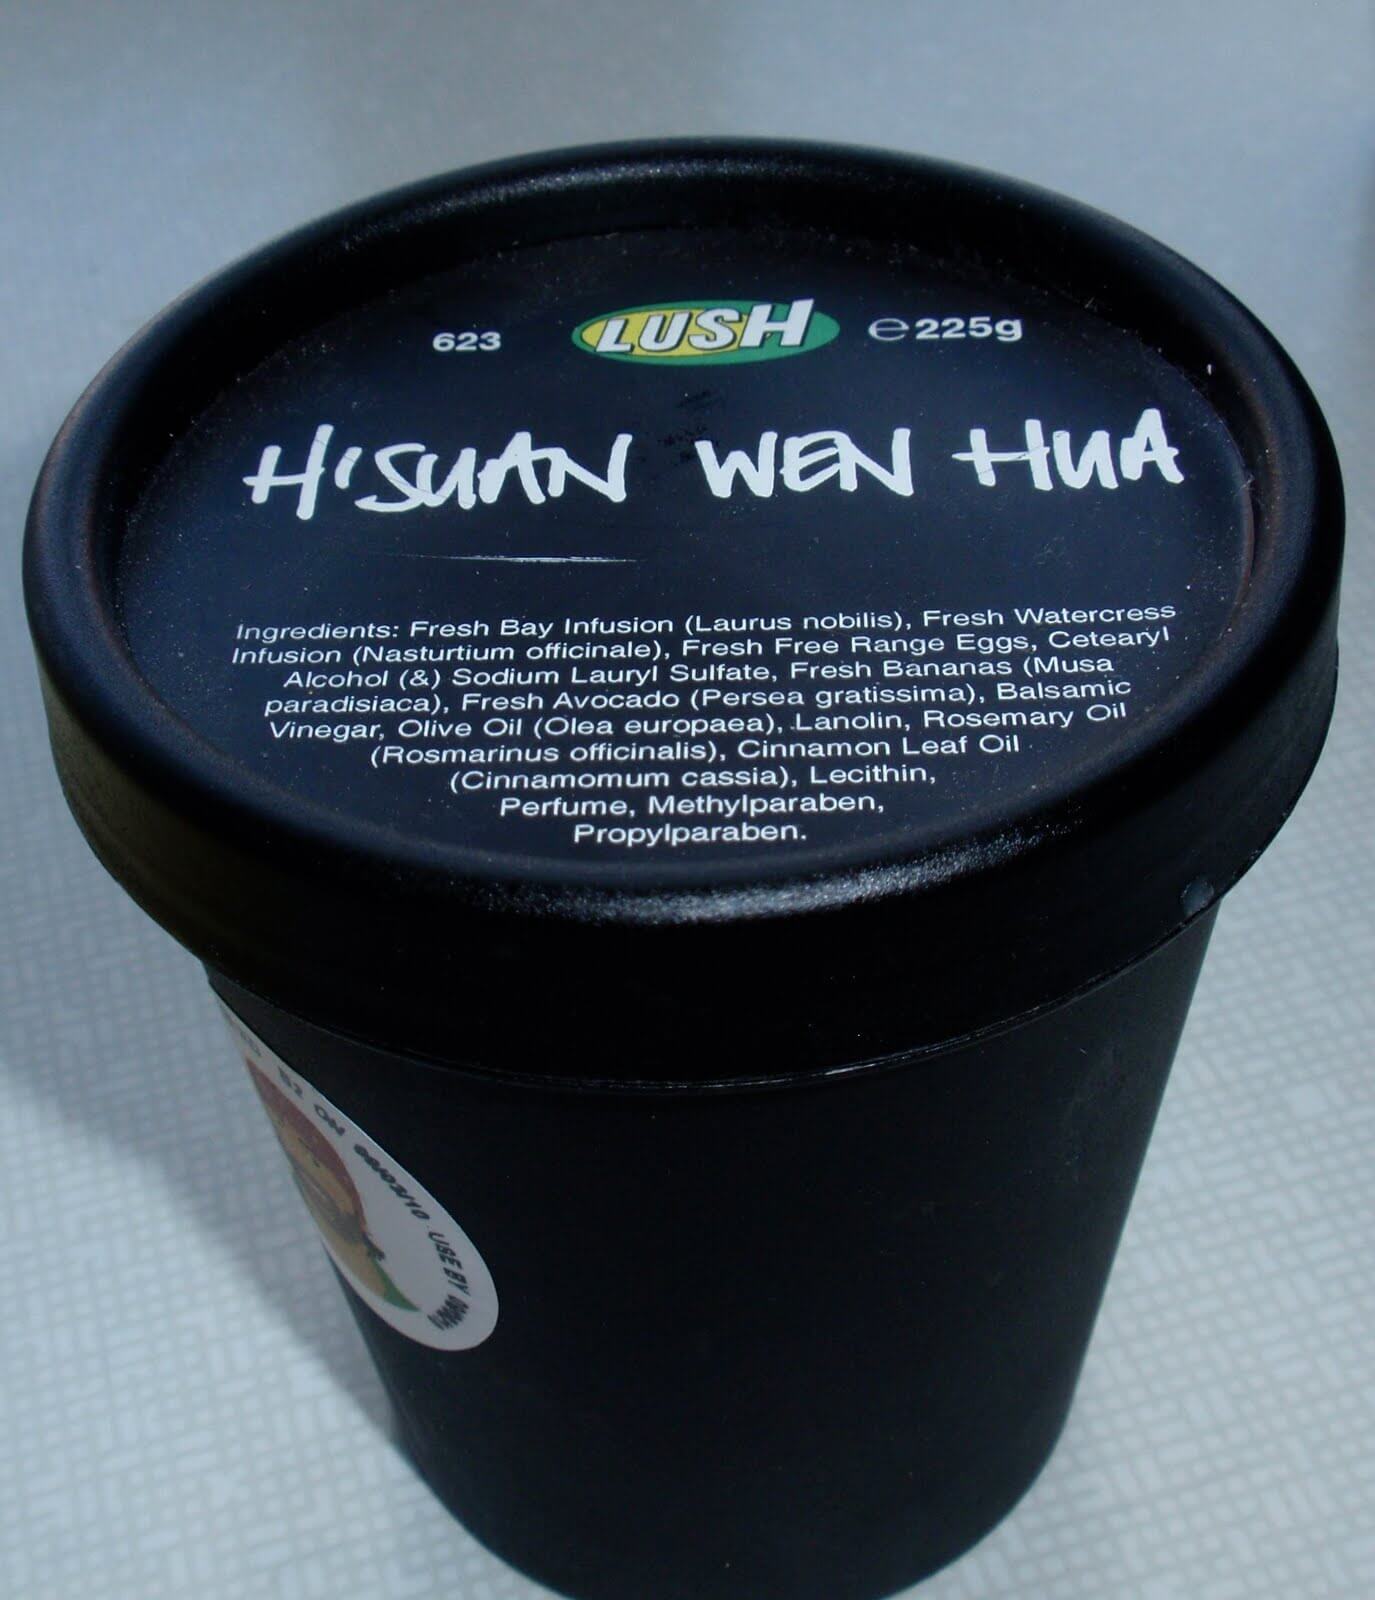
Expires on 09062010
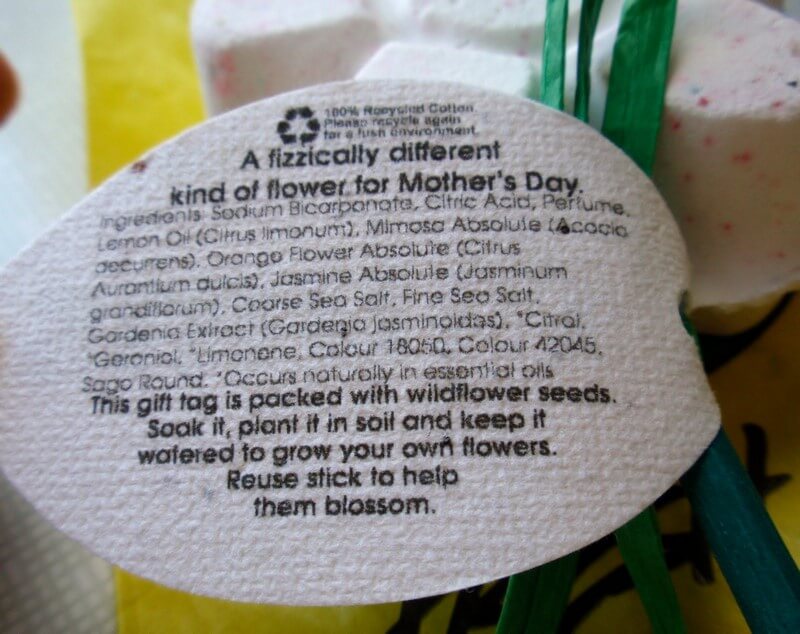
Mums bath bomb - Never had a chance to try as the bath tub here in this (rental) apartment is nasty looking. I will save it for some other time. (Got it for free)
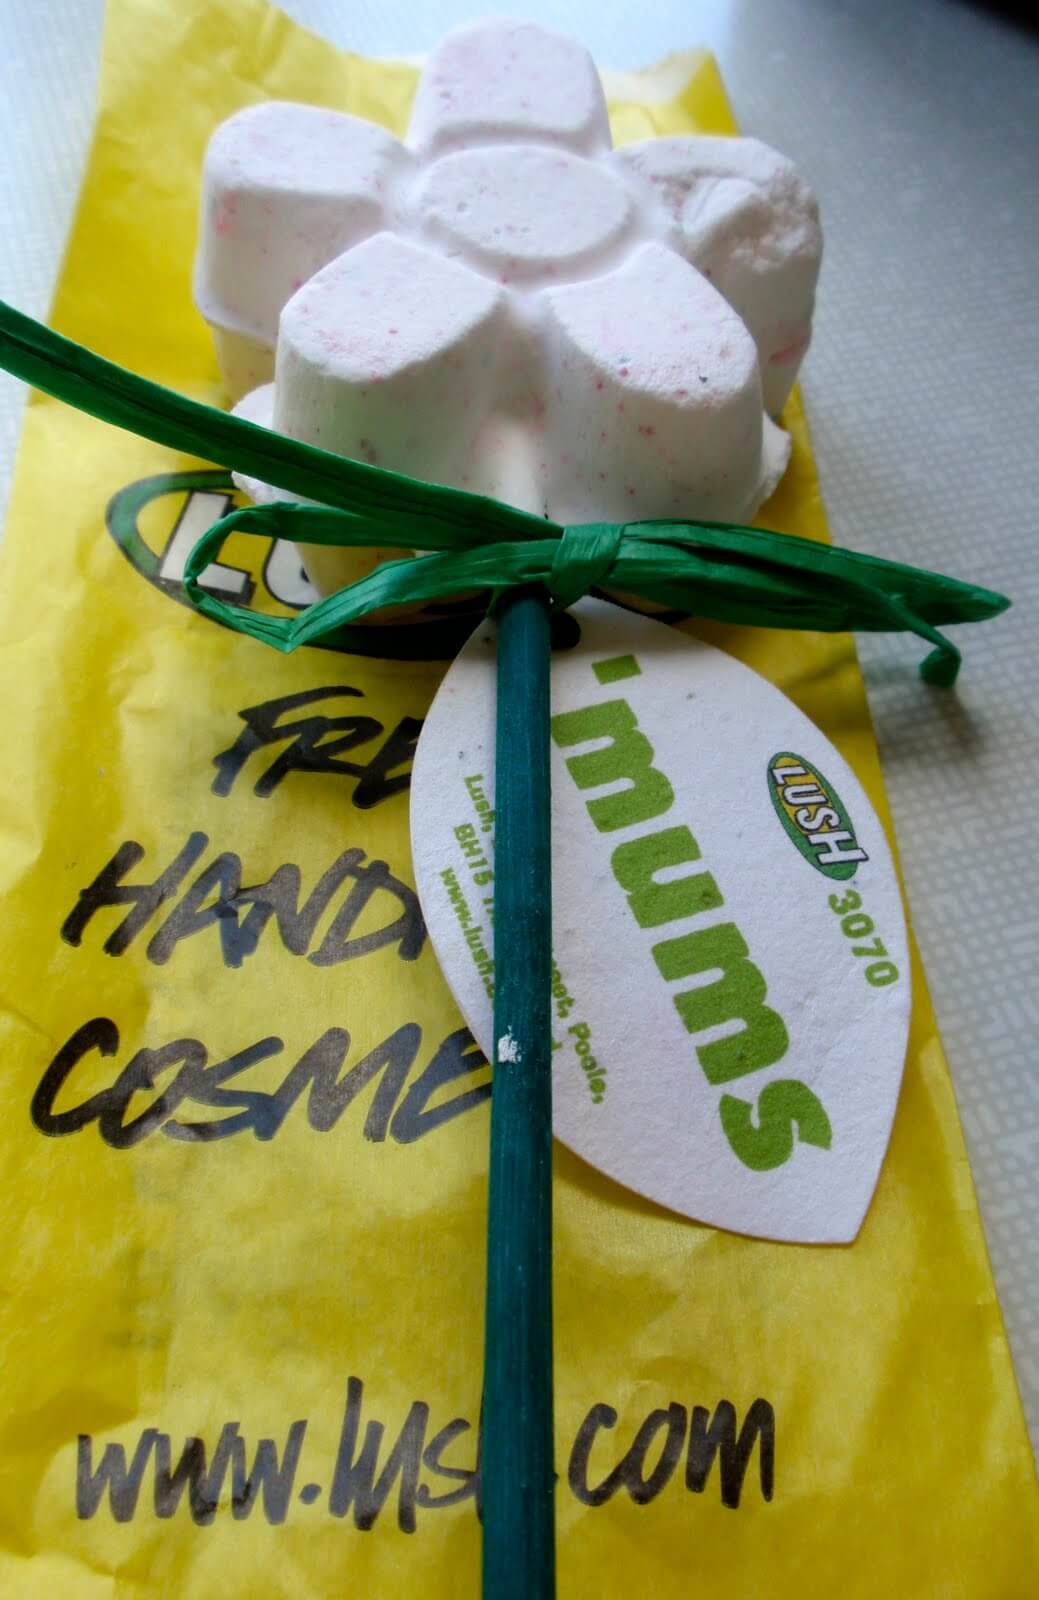
You can even grow some wild flowers with this tag! Cool idea!
Overall, I like this company. They seem to have many products which might be something to try in the near future. However, I would not spend all my money on these soaps as there are other good products out in the market. I am always open for suggestions and experimentations!
Till next time!
Love Love
Tuesday, June 8, 2010
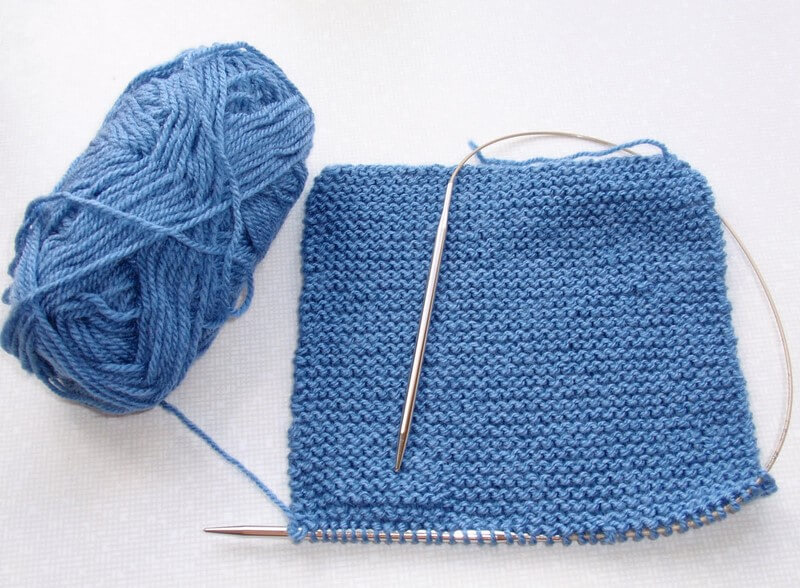
My 1st ever knitted scarf!
I have made a knitted scarf.... Yay! I never really thought I could take up knitting in the first place. It was my move to Sweden that made me decide to start doing something while I was waiting for our items from Singapore. Well, it went like this -> boredom = ideas = spending money = knitted scarf! Hooray! Thanks to Youtube (http://www.youtube.com/user/cyberseams), I was able to look at some tutorials and learn this relaxing hobby.
Here is my lovely scarf which obviously has flaws but who cares! I shall wear it proudly when it gets cold here in Sweden!
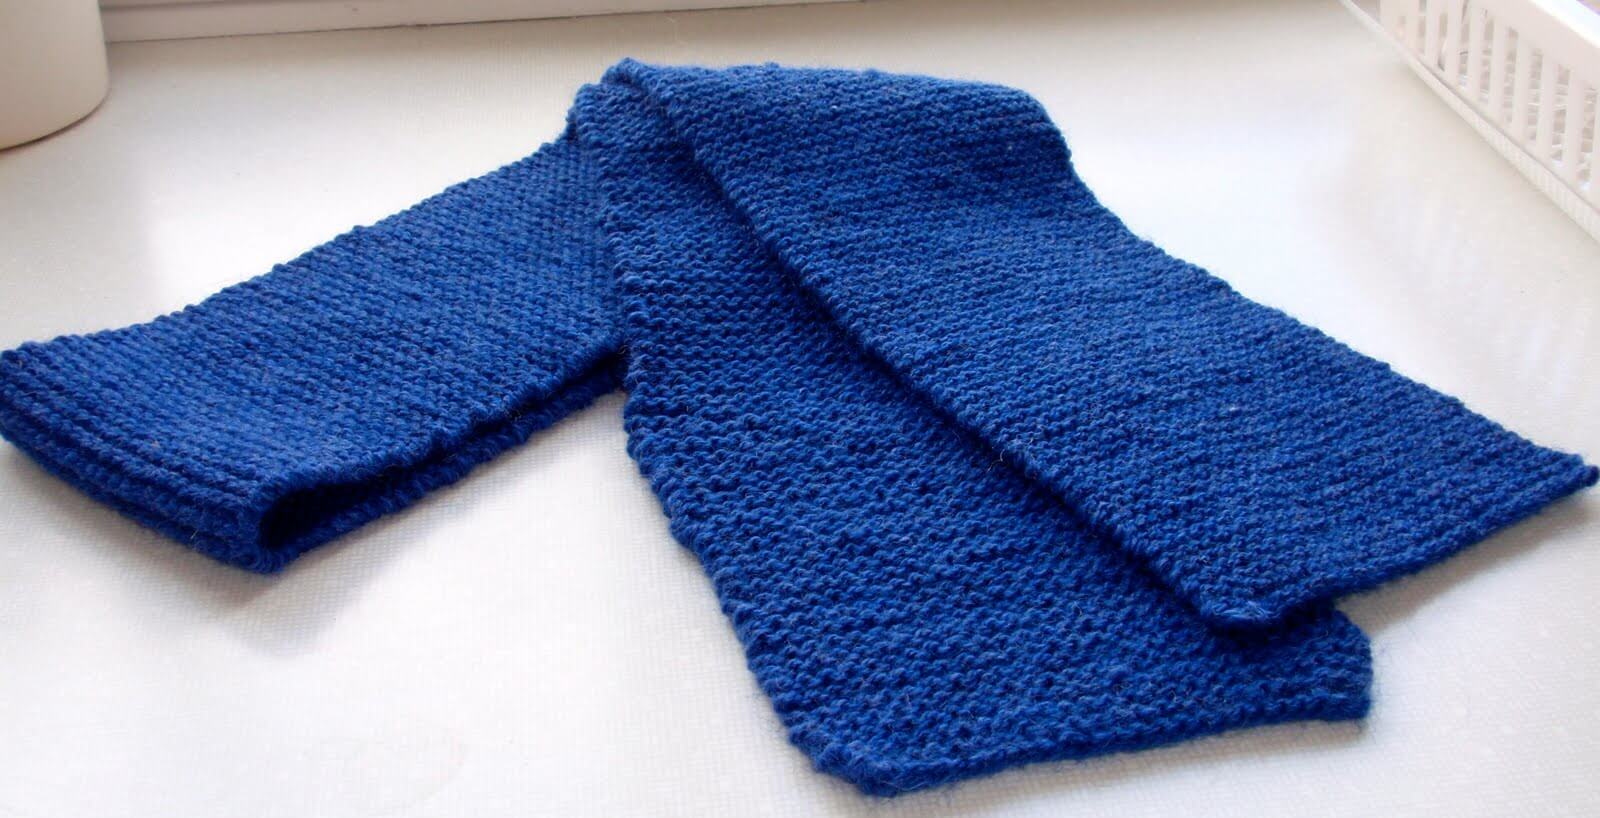
I was figuring out the tension I should use when knitting thus resulting in the obvious flaw!
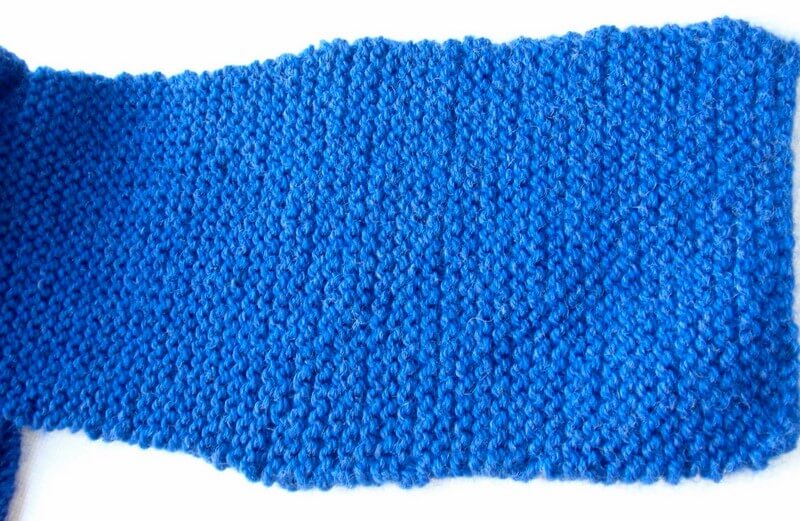
I have started to work on a scarf for my darling hubby.
Hopefully I can finish this soon and progress to making a knitted hat/cap.
That's all for now!
Love Love
Sunday, June 6, 2010
Easy party look!
I am back with a new tutorial! Yay! This is a look I wore for a friend's Phd graduation party. This is suitable for a dance night out too. It's not over the top. I am all for classy yet foxy makeup looks.
Here are the pictures and products used.


Here are the pictures and products used.


EYES
Eye primer - Urban decay primer potion
Eye base - Feline kohl power eye pencil
Mixing medium - Mac fix +
Eyeshadow - La femme Golden Khaki #13
Eyeshadow - Mac Inter-view mineralize shadow
Eyeshadow - La femme Black
Eyeliner - No brand black cream liner
Eyeliner - Feline kohl power eye pencil
False eyelashes
Mascara - Mac zoom lash in Zoom black
CHEEKS
Blush - Mac Vintage grape blush ombre
LIPS
Primer - Chapstick
Lipliner - Lakme brown lipliner
Lipstick - Mac Chatter box
Lipgloss - Mac clear lipglass
Love Love!
Subscribe to:
Posts (Atom)